You’ve got a list of jobs you want to tackle in the backyard. A retaining wall to deal with the slope. A deck off the back of the house. A pergola or two for shade. Garden beds for the herbs and flowers, maybe a vegetable garden down the side fence. A fire pit for cooler nights, string lights overhead, somewhere comfortable to put an outdoor sofa and coffee table. The question almost every DIY backyard makeover gets wrong is what to build first.
Get the order right and each stage sets up the next. Each new feature lands in the right spot, in the right way, on a backyard layout that holds together. Get it wrong and you’re pulling out a beautiful new deck to fit a retaining wall that should have gone in six months earlier, or rebuilding garden beds because the wall behind them shifted everything by 50mm.
Here’s the sequence that turns a long list of DIY ideas into a backyard oasis that actually works, why it matters, and where the order can flex on smaller jobs, including ways to add privacy and visual interest.
What to Build First in Your Backyard: The Short Answer
Retaining walls first, as they are essential for creating levels in your big backyard. Deck or patio second. Pergola, fence, and major structures third, which will enhance the visual interest of your outdoor space. Garden beds, planting, and finishes last. Drainage and smart planning sit underneath every stage. Approvals happen before any of it starts.
That’s the rule for 9 out of 10 properties. If your backyard is flat with no level changes and no structural work, the order matters less and you can chase whichever DIY project gets you closest to that serene outdoor feel first. But if you’ve got slope (and most Sunshine Coast backyards do, from Buderim to the hinterland), the sequence above isn’t optional, it’s structural.
Why DIY Backyard Planning and Project Order Matter
Outdoor spaces are built from the ground up, incorporating pathways and greenery for added beauty. The elements that hold soil, control water, and establish levels go in before anything that sits on top of them. The features that depend on stable ground and finished levels (your deck, pergola, planter pots, outdoor furniture, comfortable furniture for seating areas) go in last.
Skip that hierarchy and you’re working backwards. You’ll lay decking that needs to be cut around a wall that wasn’t there yet. You’ll plant a vegetable garden in beds that get torn up six months later. You’ll spend twice on the same DIY project because the second trade has to undo what the first one did.
The principle is simple: structural before decorative to make your backyard truly functional. Heavy work before lightweight finishes, ensuring that any walkway is properly laid out first. Drainage and smart planning at the start, not bolted on at the end.
Step 1: Retaining Walls (Almost Always First)
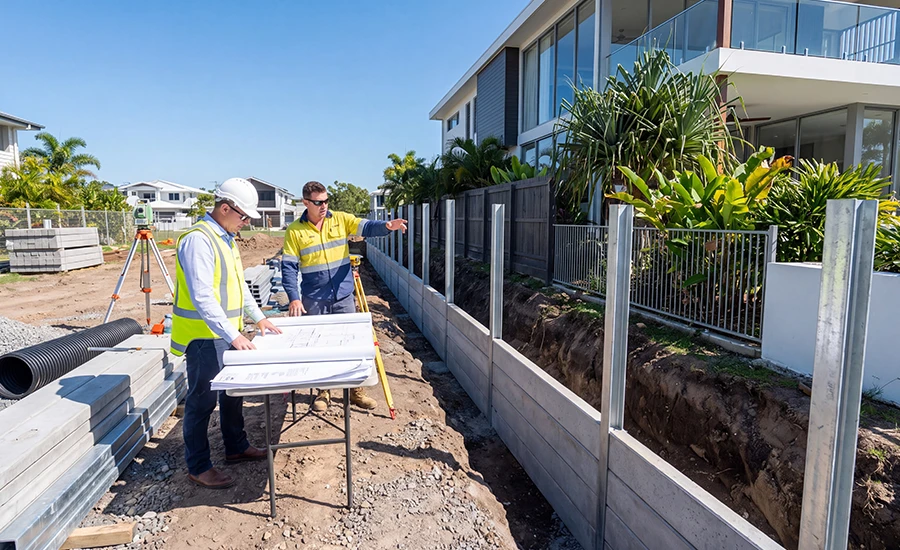
If your backyard needs any level change, the retaining wall comes first. No negotiating; it’s crucial to follow the order to make your backyard successful. A retaining wall sets the levels for everything that follows. Until the wall is in, you don’t know exactly where the finished deck height sits, where the garden beds back onto, or how water moves through the outdoor space.
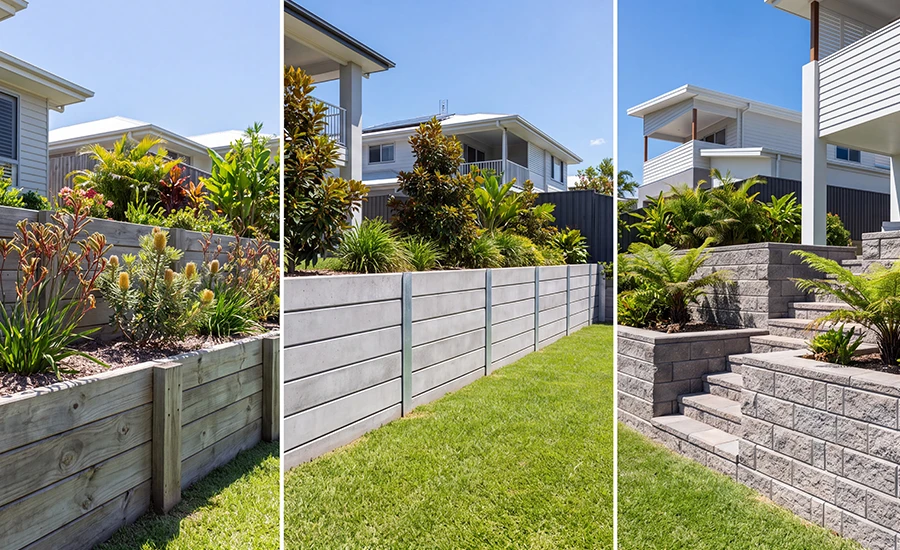
Retaining walls also involve the heaviest equipment on the project. Excavators, bobcats, and truck deliveries need clear ground space. Build a deck or install a pergola first and you’ve blocked the route the wall builder needed. Now your wall is being built by hand at double the cost, or your new deck is coming up so the contractor can get through. Our breakdown of timber, block, and concrete retaining walls in coastal QLD covers material selection at this first stage.
How Retaining Walls Shape Your Backyard Layout
A 1.2m wall along the back boundary changes the usable depth of the backyard by about 1.5m once you allow for batters and footings. That difference decides where the deck can sit, how big the lawn area is, and whether your garden beds run along the wall or sit independently. Until that wall is built, every other measurement (including the spot you imagined for the fire pit, the outdoor dining table, or the small backyards classic of a vertical garden) is a guess.
Step 2: Deck or Patio (After the Walls, Before the Planting)
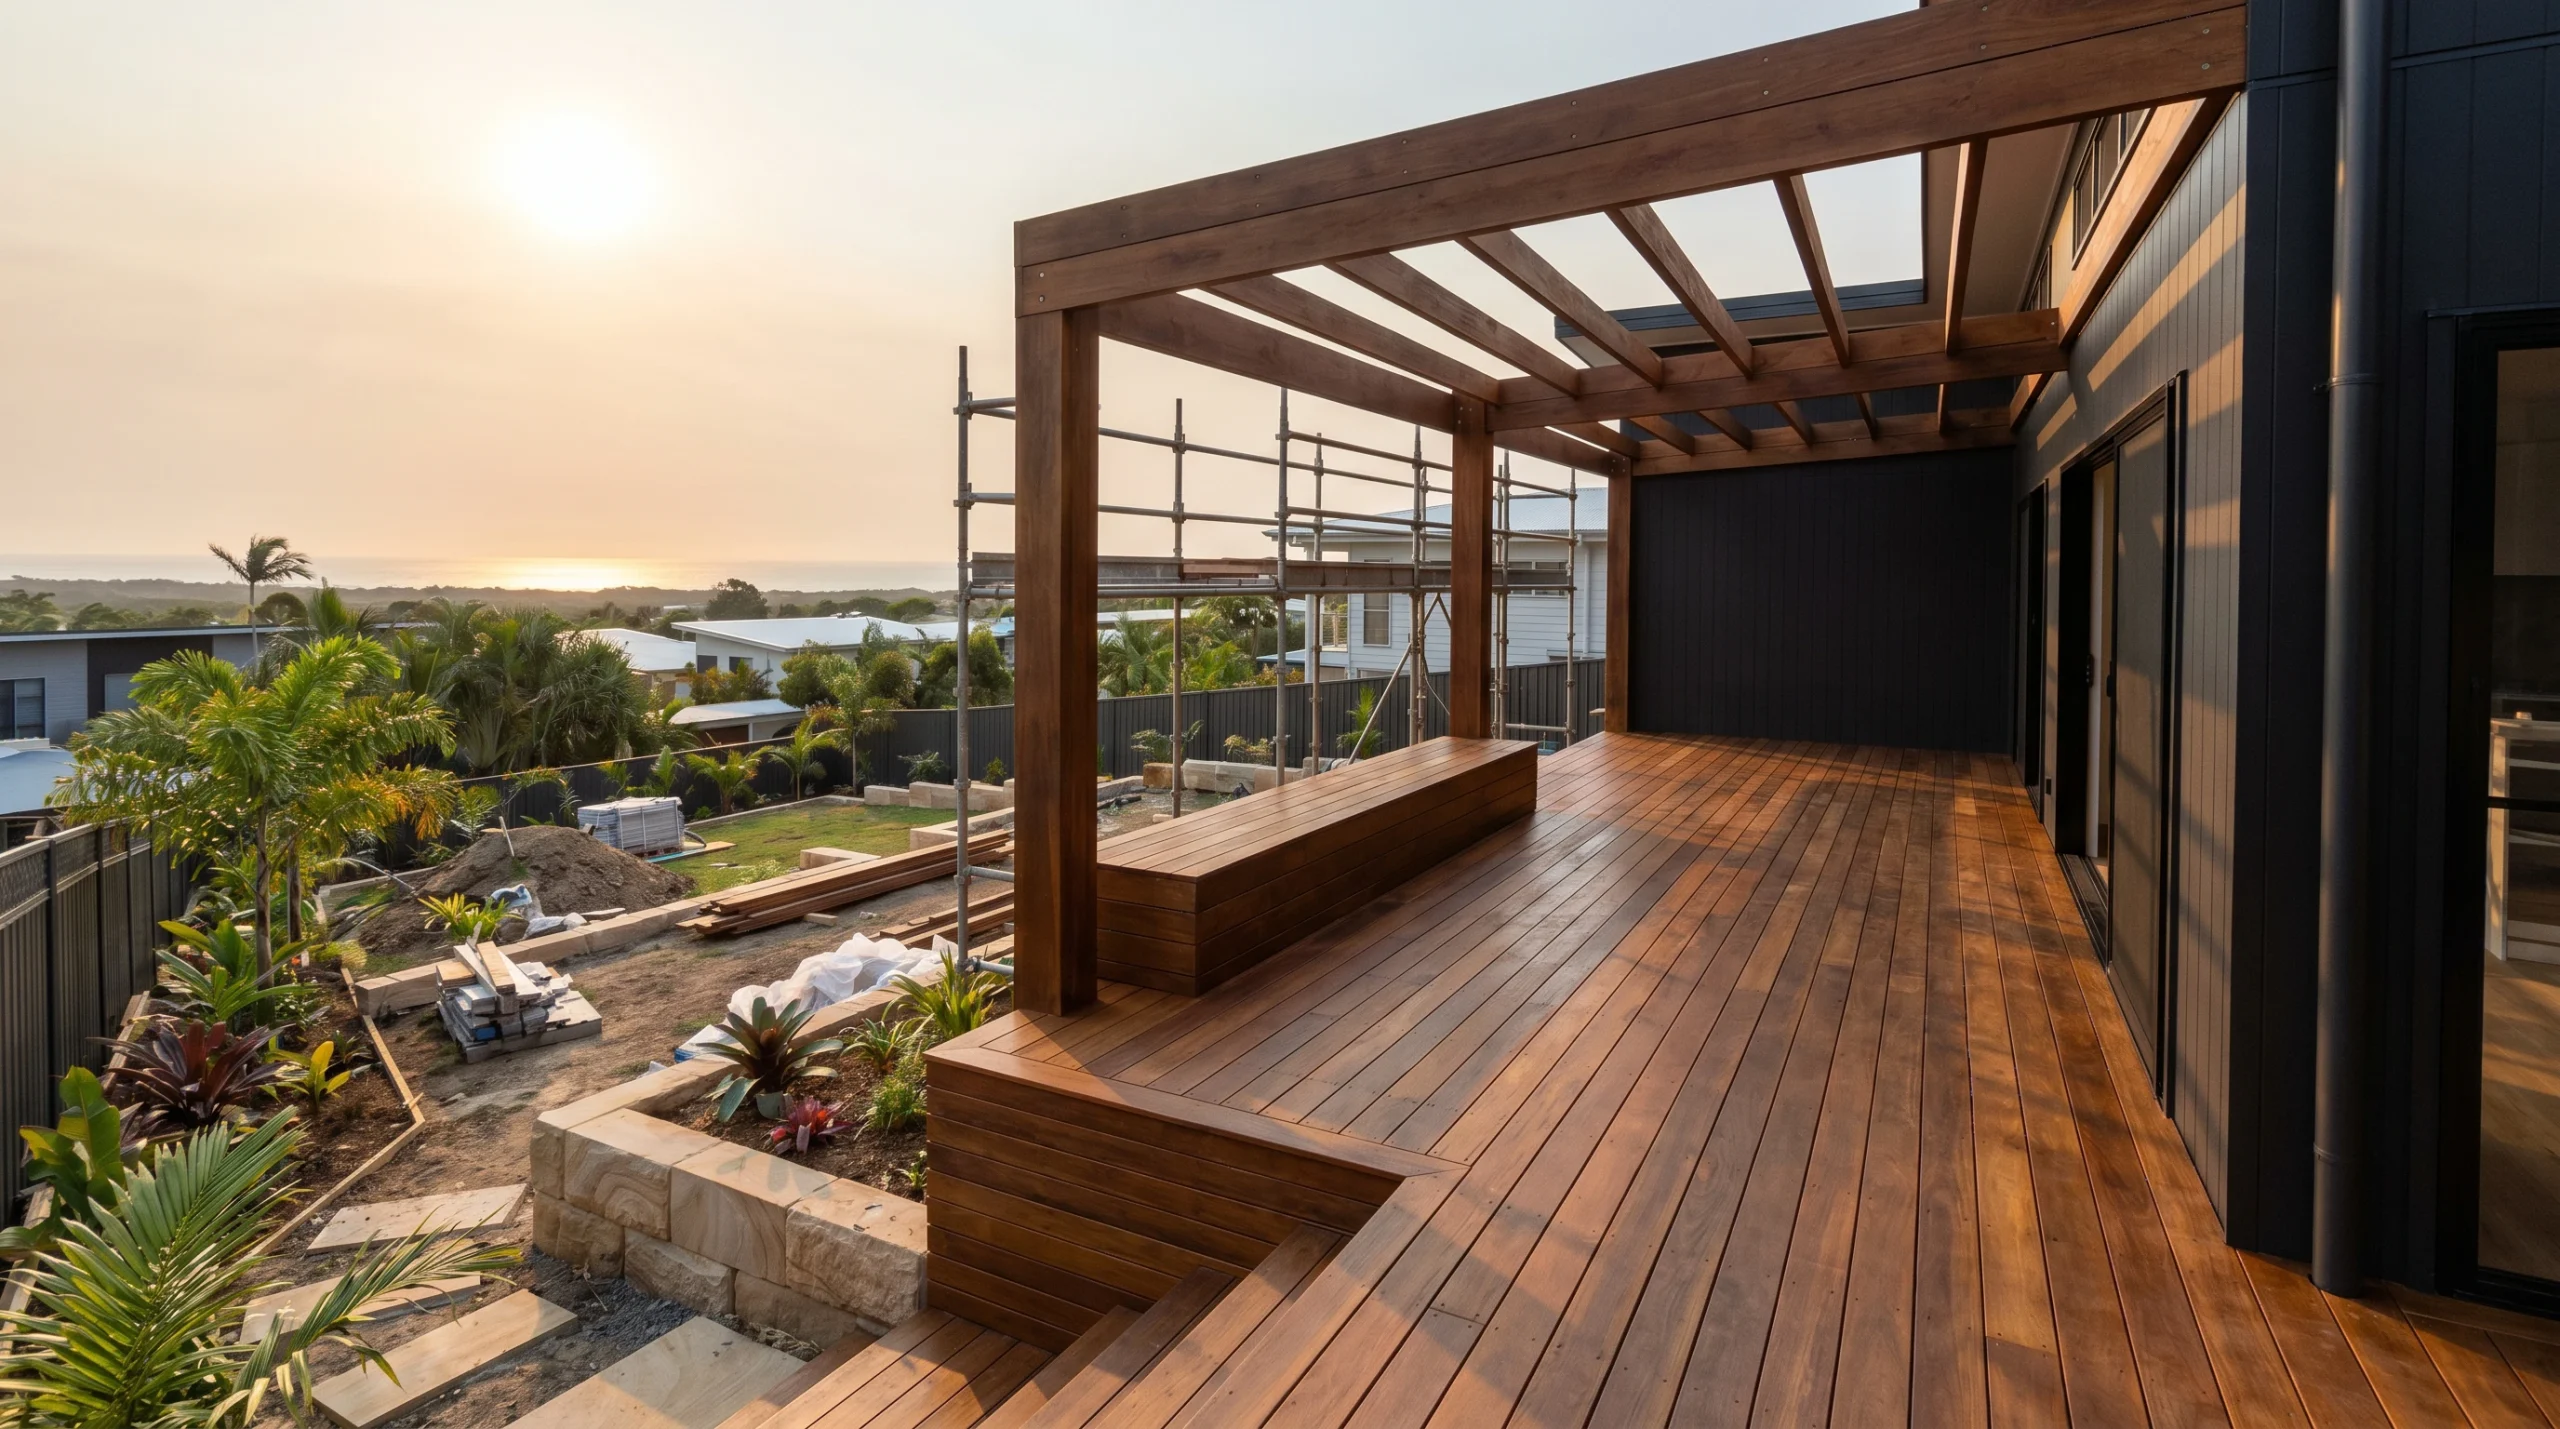
With the walls in and levels set, decking or patio construction is the next major build. The deck sits on the finished site, ties into the house at one level and the outdoor area at another, and creates the platform that the rest of the outdoor space flows off.
A deck comes before planting and lighter DIY features for one practical reason: deck construction is dirty and disruptive. Subframe materials get dropped, screws and offcuts get stepped into the soil, and the install crew spends days walking through the backyard with loaded tools. Putting that level of foot traffic through finished garden beds, planter pots, or DIY ideas you’ve already installed is a guaranteed way to compact soil, snap stems, and crush new planting.
There’s also a sequencing benefit to settled levels. The wall has been in for a few weeks, the backfill has had time to settle, and any drainage issues have shown up before they’re hidden under decking. If something needs adjusting, it gets adjusted now, not after the boards are down. For the design choices that affect deck cost and lifespan, our overview of decking on the Sunshine Coast covers the material and planning decisions that shape a long-term build.
Step 3: Pergola, Fence, and Privacy Solutions
Once the deck or patio is in, the next layer is the structural overhead and boundary work: a pergola for shade, a wooden fence for the side boundary, and any built-in privacy screen or trellis that needs to anchor into the deck or paving. Installing a pergola or DIY pergola at this stage means the posts can be fixed properly through the finished surface, the geometric design lines up with the deck, and you’re not back-engineering everything later.
Privacy solutions belong in this stage too. A bamboo screen along the fence line, climbing plants on a trellis, a green wall, or outdoor curtains hung from the pergola all need their structural anchors in place before they go up. Create privacy at this stage and it integrates cleanly, instead of looking bolted on. Lighter tones in the fence and pergola open up small backyards, while darker timber gives a tropical feel that suits Sunshine Coast aesthetics. Smart planning here saves a lot of rework later.
[Insert image: backyard project sequence diagram showing retaining wall, deck, pergola, and garden beds in order]
Step 4: Garden Beds, Planting, and Finishing Touches
Garden beds, vegetable garden plots, and planting come last because they’re the most vulnerable to damage and the easiest to redo if you get the backyard layout wrong. Soil is forgiving. Concrete is not. By the time the wall, deck, and pergola are finished, you can see exactly how the outdoor space reads, where the sun hits at different times of day, and where the garden beds make practical sense rather than just looking good on a plan.
Building beds last also means your soil and planting investment goes into a backyard that’s already been disrupted, regraded, and finalised. Build raised beds first and there’s a real chance they get demolished or moved when the retaining or deck work happens. Build them last and they sit in their final position from day one. Our guide to raised garden beds on the Sunshine Coast covers the drainage and soil structure that decides whether those beds last two years or fifteen, while also discussing ways to turn your backyard into a thriving garden.
The Lightweight DIY Layer
The last DIY layer is the one that turns a finished backyard into a backyard oasis: the outdoor sofa, dining table, plant pots and lanterns, string lights or LED strips overhead, a fountain or water feature in a quiet corner, an outdoor shower if you’re near the pool, comfortable furniture in defined seating areas. These items don’t need building permits. They need a finished outdoor space to land in.
This is where budget-friendly DIY ideas really pay off. A few terracotta plant pots, real grass underfoot, climbing plants up the trellis you built in stage three, a fire pit area defined by pavers, and a few al fresco touches like outdoor curtains and a rug under the dining table. Honestly, the people who get the most out of their backyard are the ones who finish the structural stages properly, then layer the lightweight stuff at their own pace, including tiles and greenery.
Where It Gets Complicated: Sloping Blocks
Sloping blocks throw extra wrinkles into the sequence. The retaining wall isn’t just one wall. It might be a series of tiered walls at different heights, integrated with a multi-level deck and worked around fixed services like sewer lines. The sequence is still walls first, then deck, then pergola, then planting, but the planning stage at the front of the project is significantly more involved, especially in small spaces.
For sloping sites, decisions about deck level, wall height, and structural connections are made together at the design stage, even though the physical build happens in order. Our deep dive into how decking, retaining walls, and levels work together on sloping blocks covers the integration in detail.
Budget Sequencing for a DIY Backyard Makeover
There’s a financial side to project order that doesn’t get talked about enough. Retaining walls are usually the most expensive single element, especially on sloping blocks. Doing them first means the biggest spend lands at the start of the project, which most homeowners find emotionally easier than budgeting the same number two years in when the rest of the work has already drained the makeover fund.
It also locks in the most important structural element. If the budget gets tight halfway through, you can stretch the timeline on the deck, scale back the pergola, or push the fire pit and outdoor furniture to next summer. You can’t easily stretch the timeline on a wall that should already be holding back soil. The homeowners who run into trouble are usually the ones who put the most enjoyable parts first (the outdoor movie setup, the outdoor retreat, the plant pots and string lights) and ran out of money before the structural work got done.
Council Approval Sits at the Very Start
Approvals belong before any sod gets turned. Retaining walls over 1m, decks attached to the dwelling, fences over a certain height, and structures near boundaries all have approval thresholds in Sunshine Coast Council jurisdiction. Plenty of homeowners find out about the rules when a neighbour complains halfway through a build. That’s what we do every day at Greener Landscaping, so we handle the approvals at the start of every project, not as an afterthought, and we know when professional help saves you significant time and money over DIY.
When the Sequence Relaxes
There’s one scenario where the strict order eases up: a fully designed, fully approved, fully scoped backyard package where every trade is briefed at the same time. Walls go in, deck builders start the day backfill is signed off, pergola installers are scheduled, planting crews are booked. The work still happens in order, but it happens continuously, and the whole backyard finishes in months rather than years.
That approach costs more upfront in design and planning, but it almost always works out cheaper than building one feature a year over a four year span. It also avoids the situation where each new stage has to work around what was built before it.
Frequently Asked Questions
Can I build a deck before the retaining wall?
You can, but you usually shouldn’t. Deck height depends on finished ground level, and finished ground level depends on the wall. Building a deck first means guessing at the finish height and often cutting or rebuilding sections once the wall goes in.
Where does a pergola fit in the sequence?
After the deck or patio. Pergola posts need to anchor into a finished surface, and the geometric design works best when it’s planned alongside the deck rather than added later. A DIY pergola is a great weekend project, but only once the structural stages are done.
When can I install garden beds and the vegetable garden?
Last. Garden beds and any vegetable garden plot sit in finished ground, after walls, decks, and pergolas are in. Building them early almost always means rebuilding them when later stages need access through the area.
Is the build order different for small backyards?
The order is the same, but the stakes are higher in small spaces because there’s less room to recover from mistakes. Smart planning matters even more when ground space is limited and space is limited overall. Vertical gardens, climbing plants, and built-in seating help every square metre work harder.
How long should I wait between stages?
Allow 2 to 4 weeks between a retaining wall and the next stage, mainly so backfill can settle and any drainage issues show up. For deck to pergola, and pergola to garden beds, you can usually move straight on once each stage is finished and the site is clean.
What if I’ve already built things out of order?
You’re not alone, and it’s not always a disaster. A good landscaper can assess what’s in place, plan the remaining work around it, and minimise damage to the existing build, ensuring a cohesive design that incorporates a tub or walkway. The cost is usually higher than doing it in sequence, but it’s rarely a full demolition. Professional help at this point usually saves money over trying to DIY around earlier mistakes.
Build Your Backyard Oasis in the Right Order
A DIY backyard makeover built in the right order finishes on time, on budget, and with every feature working with the next. One built out of order finishes over budget, with trades undoing each other’s work and homeowners paying twice for the same job. The difference between those two outcomes is a few hours of smart planning at the start.
If you’re sizing up a backyard project and you’re not sure where to begin, give us a call on 07 4120 7807. We’ll walk through the site, talk through what needs to happen in what order, and put together a sequence that gets the structural work done first and leaves you free to enjoy the outdoor sofa, string lights, and fire pit nights at the end.
Related posts:
- Creating Low-Maintenance Landscapes for Large Properties
- Why Large Site Builders & Developers in Brisbane Queensland Choose Commercial Landscape Specialists for Landscaping Partners
- How Sunshine Coast Landscaping Adds Real Value to Your Property (With Local Examples)
- Sunshine Coast Landscaping Regulations: What You Need to Know Before You Build